
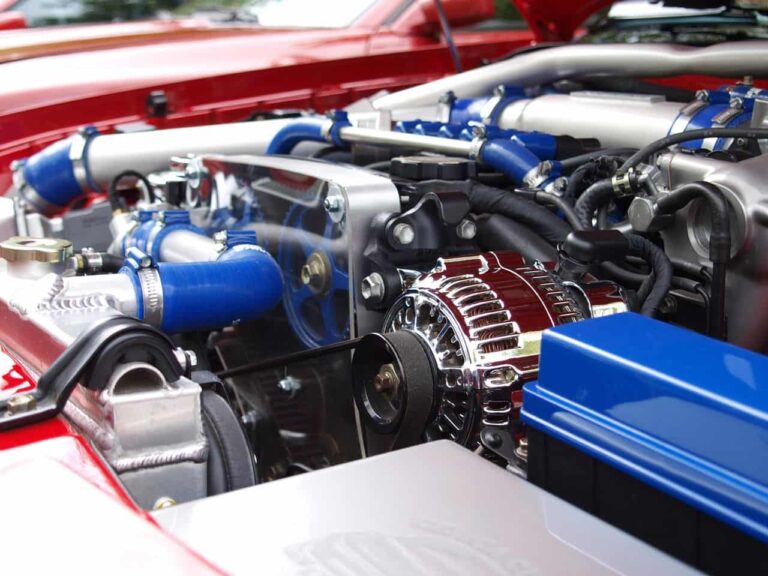
The alternator is one of the most important components of your vehicle’s electrical system. It generates electricity while the engine is running, charging the battery and supplying power to essential systems such as the headlights, ignition, air conditioning, and onboard electronics. When the alternator begins to fail, your battery can quickly lose its charge, eventually leaving your vehicle unable to start. Learning how to replace an alternator can help you save money on repairs and restore your vehicle’s charging system.
Replacing an alternator requires basic mechanical skills and the proper tools. This guide explains the process step by step, making it easier to complete the job safely and correctly.
Why the Alternator Is Important
The alternator converts mechanical energy from the engine into electrical energy. It keeps the battery charged while providing power for your vehicle’s electrical accessories.
Without a functioning alternator, the battery alone cannot support the vehicle for very long. Once the battery is depleted, the engine may stall and fail to restart. A healthy alternator ensures reliable starting, stable electrical performance, and proper battery charging.
Signs Your Alternator Needs Replacement
Several symptoms may indicate that the alternator is failing. Common warning signs include:
- Battery warning light on the dashboard
- Dim or flickering headlights
- Slow engine cranking
- Dead battery despite recent replacement
- Electrical accessories operating poorly
- Burning rubber or electrical smell
- Whining or grinding noises from the alternator
If you notice one or more of these symptoms, test the charging system before replacing the alternator.
Tools You Will Need
Before beginning the replacement, gather the following tools:
- Replacement alternator
- Socket and ratchet set
- Combination wrenches
- Serpentine belt tool or breaker bar
- Torque wrench
- Protective gloves
- Safety glasses
- Vehicle owner’s manual
Always purchase an alternator that matches your vehicle’s make, model, engine, and electrical specifications.
Step 1: Park the Vehicle Safely
Park your vehicle on a flat surface and engage the parking brake.
Turn off the engine and allow it to cool before opening the hood.
Disconnect the negative battery terminal to eliminate the risk of electrical shock or accidental short circuits while working.
Also Read: How to Replace Windshield Wipers
Step 2: Locate the Alternator
Open the hood and locate the alternator.
It is typically mounted near the front of the engine and connected to the serpentine belt.
The alternator has electrical connectors attached to the rear and usually features a visible cooling fan or ventilation openings.
Consult your owner’s manual if you have difficulty identifying its location.
Step 3: Remove the Serpentine Belt
Locate the automatic belt tensioner.
Use a serpentine belt tool or breaker bar to relieve belt tension.
Slide the serpentine belt off the alternator pulley while holding the tensioner in the released position.
Slowly return the tensioner to its original position.
Inspect the serpentine belt for cracks or excessive wear. If it is damaged, replacing it at the same time is recommended.
Step 4: Disconnect the Electrical Connections
Carefully disconnect the electrical connector attached to the alternator.
Remove the protective cover from the main charging cable if equipped.
Use the appropriate wrench to remove the retaining nut and disconnect the battery cable from the alternator.
Keep track of all hardware for reinstallation.
Step 5: Remove the Alternator Mounting Bolts
Locate the mounting bolts securing the alternator to the engine bracket.
Use the correct socket or wrench to remove each bolt.
Support the alternator with one hand while removing the final bolt to prevent it from falling.
Carefully lift the alternator out of the engine compartment.
Compare the old alternator with the replacement unit to verify identical mounting points, pulley size, and electrical connections.
Step 6: Install the New Alternator
Position the new alternator in the mounting bracket.
Install the mounting bolts by hand to prevent cross-threading.
Once all bolts are in place, tighten them according to the manufacturer’s recommended torque specifications.
Proper tightening ensures the alternator remains securely mounted during engine operation.
Step 7: Reconnect the Electrical Connections
Reconnect the main charging cable to the alternator and tighten the retaining nut securely.
Install the protective terminal cover if applicable.
Reconnect the electrical connector until it locks firmly into place.
Inspect all wiring for secure connections and verify that no cables are rubbing against moving engine components.
Step 8: Reinstall the Serpentine Belt
Route the serpentine belt around the pulleys according to the belt routing diagram.
Use the belt tensioner tool to relieve tension and slide the belt over the alternator pulley.
Slowly release the tensioner and confirm the belt sits correctly within every pulley groove.
Reconnect the negative battery terminal once installation is complete.
Test the Charging System
Start the engine and observe the alternator and serpentine belt while the engine is idling.
The battery warning light should turn off shortly after the engine starts.
Turn on the headlights, air conditioning, and other electrical accessories to verify normal operation.
If available, use a digital multimeter to check battery voltage while the engine is running. A healthy charging system typically produces between 13.5 and 14.8 volts.
How Often Should an Alternator Be Replaced?
Alternators commonly last between 80,000 and 150,000 miles, although lifespan varies depending on driving conditions and electrical load.
Routine inspections of the charging system and serpentine belt can help identify wear before complete alternator failure occurs.
Replacing worn bearings or damaged belts promptly may also extend alternator life.
Common Mistakes to Avoid
Never replace the alternator without disconnecting the battery first.
Avoid installing the wrong alternator for your vehicle.
Do not overtighten electrical terminal connections.
Ensure the serpentine belt is routed correctly before starting the engine.
Ignoring battery or charging system problems after installation may indicate additional electrical issues requiring diagnosis.
Conclusion
Learning how to replace an alternator is a valuable maintenance skill that can restore your vehicle’s charging system and prevent unexpected breakdowns. With the proper tools, careful installation, and attention to safety, many vehicle owners can complete this repair at home.
Regular inspections of the alternator, battery, and serpentine belt help ensure reliable electrical performance and extend the life of your vehicle’s charging system. By following this step-by-step guide and replacing a failing alternator promptly, you can maintain dependable engine starting and keep your vehicle running smoothly.
