
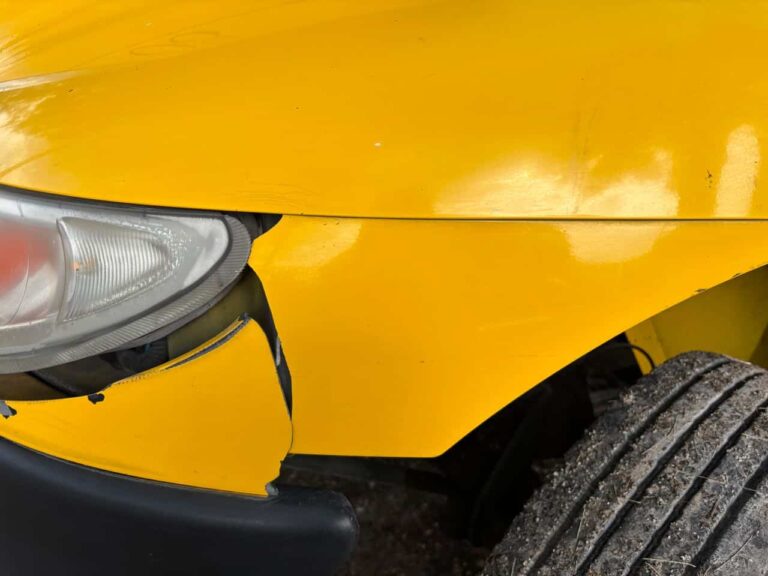
A cracked plastic bumper is a common type of vehicle damage caused by minor collisions, parking accidents, or road debris. While the damage may look serious, many plastic bumper cracks can be repaired without replacing the entire bumper. A proper repair restores strength, improves appearance, and helps maintain your vehicle’s value. This guide explains how to repair plastic bumper cracks, the tools you’ll need, and when a repair is the best option.
Can Plastic Bumper Cracks Be Repaired?
Most modern vehicle bumpers are made from flexible plastic materials designed to absorb minor impacts. Small to medium-sized cracks can usually be repaired using plastic repair products, adhesives, or plastic welding techniques. However, the success of the repair depends on the size, location, and severity of the crack.
Repair is generally a good option when:
- The crack is relatively short.
- The bumper is still securely attached.
- No large sections of plastic are missing.
- Mounting tabs remain intact.
- The damage has not severely distorted the bumper.
If the bumper has extensive damage or structural failure, replacement may be the better solution.
Tools and Materials You’ll Need
Before starting the repair, gather the necessary supplies.
Common tools include:
- Safety gloves
- Safety glasses
- Automotive soap and water
- Wax and grease remover
- Sandpaper in various grits
- Plastic repair adhesive or epoxy
- Plastic welding kit (optional)
- Plastic filler for bumpers
- Sanding block
- Primer
- Matching automotive paint
- Clear coat
- Microfiber cloths
Using products designed specifically for automotive plastics provides the best results.
Step 1: Clean the Damaged Area
Begin by washing the bumper thoroughly with automotive soap and water to remove dirt, road grime, and debris. Dry the surface completely before using a wax and grease remover to eliminate any remaining contaminants.
A clean surface allows repair materials to bond properly and improves the durability of the repair.
Step 2: Inspect the Crack
Examine both the front and back of the bumper if possible. Determine whether the crack extends through the entire thickness of the plastic and check for hidden damage around the impact area.
Small surface cracks are easier to repair than deep cracks that affect the bumper’s structural integrity.
Step 3: Prepare the Surface
Use medium-grit sandpaper to roughen the area surrounding the crack on both sides of the bumper. Sanding creates a textured surface that improves adhesion for repair materials.
If the crack has sharp edges or loose plastic, trim them carefully before continuing.
Clean away sanding dust with a microfiber cloth.
Also Read: Seasonal Tire Maintenance
Step 4: Repair the Crack
There are two common methods for repairing plastic bumper cracks.
Plastic Repair Adhesive
Apply a high-quality plastic repair adhesive according to the manufacturer’s instructions. Some products require mixing two components before application.
Press the cracked edges together firmly and allow the adhesive to cure fully. Reinforcement mesh may be applied to the backside of larger cracks for additional strength.
Plastic Welding
Plastic welding uses controlled heat to melt the damaged plastic and fuse the crack together. A compatible plastic filler rod strengthens the repair while maintaining flexibility.
Plastic welding is often preferred for larger cracks because it creates a durable bond when performed correctly.
Step 5: Apply Plastic Filler
After the crack has been repaired, apply a thin layer of flexible plastic filler to smooth the repaired area.
Allow the filler to cure completely before sanding it with progressively finer sandpaper until the surface blends seamlessly with the surrounding bumper.
Taking time during this step produces a more professional-looking finish.
Step 6: Prime the Surface
Apply an automotive primer designed for plastic bumpers. Primer improves paint adhesion and helps create an even surface for the final finish.
Several light coats generally provide better coverage than one heavy coat.
Allow the primer to dry completely before sanding lightly with fine-grit sandpaper if needed.
Step 7: Paint the Repaired Area
Apply matching automotive paint in multiple thin coats rather than one thick application. This technique reduces the risk of runs and produces a smoother finish.
Once the color coat has dried, apply several coats of clear coat to protect the repair and restore gloss.
Allow adequate curing time before washing or waxing the vehicle.
Common Mistakes to Avoid
Avoid these common errors during bumper repair:
- Skipping surface preparation
- Using household adhesives instead of automotive repair products
- Applying thick layers of filler
- Sanding too aggressively
- Painting before adhesives have fully cured
- Ignoring damage on the backside of the bumper
Proper preparation is often the difference between a lasting repair and one that fails prematurely.
When Should You Replace the Bumper?
Repair is not always the safest or most cost-effective option.
Consider replacement if:
- Large sections of plastic are missing.
- The bumper is severely warped.
- Multiple mounting points are broken.
- The damage affects crash safety components.
- Previous repairs have failed repeatedly.
A professional inspection can determine whether repair or replacement is the better long-term solution.
Tips for Long-Lasting Results
To maximize the durability of your repair:
- Use products specifically made for automotive plastics.
- Follow curing times recommended by the manufacturer.
- Avoid exposing the repaired bumper to extreme temperatures immediately after painting.
- Wash the vehicle gently during the first few weeks.
- Apply protective wax only after the paint has fully cured.
These simple practices help maintain the appearance and strength of the repaired bumper.
Final Thoughts
Learning how to repair plastic bumper cracks can help restore your vehicle’s appearance while reducing repair costs. Small to moderate cracks are often repairable using quality plastic repair adhesives or plastic welding techniques, combined with careful surface preparation and proper refinishing. Although some repairs can be completed at home, larger or structurally significant damage should be evaluated by a professional to ensure the bumper continues to perform safely. With the right tools, patience, and attention to detail, a well-executed repair can extend the life of your bumper and keep your vehicle looking its best.
