
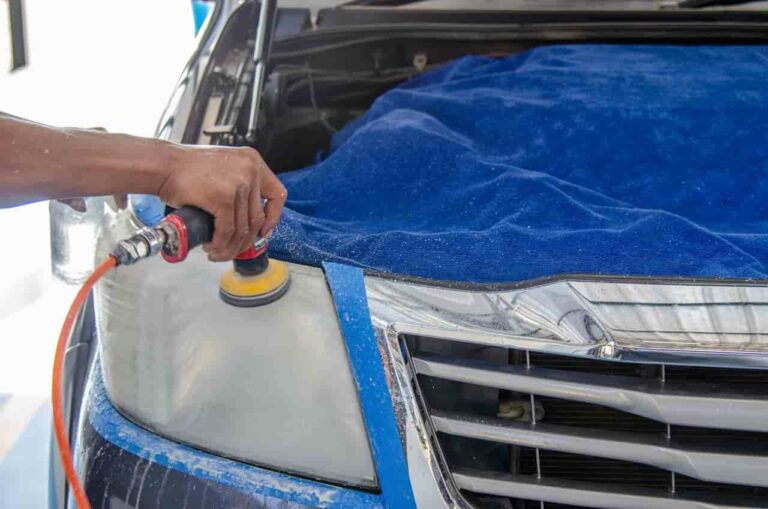
Your vehicle’s headlights are essential for safe driving, especially at night, during heavy rain, or in foggy conditions. Over time, however, headlight lenses can become cloudy, yellow, or oxidized due to constant exposure to sunlight, road debris, moisture, and environmental pollutants. Dull headlights not only reduce your vehicle’s appearance but also decrease light output, making nighttime driving more dangerous. Headlight restoration is an effective solution that removes oxidation, restores lens clarity, and improves headlight performance without the expense of replacing the entire headlight assembly. Whether you choose a DIY restoration kit or professional service, restoring your headlights can significantly enhance both safety and the look of your vehicle.
What Is Headlight Restoration?
Headlight restoration is the process of cleaning, polishing, and repairing the outer surface of plastic headlight lenses to remove oxidation, scratches, and discoloration. Most modern vehicles use polycarbonate plastic lenses, which are lightweight and durable but susceptible to UV damage over time.
The restoration process removes the damaged outer layer and applies a protective coating that helps prevent future oxidation. When completed correctly, restored headlights can look almost like new and provide noticeably brighter illumination.
Why Headlights Become Cloudy
Understanding what causes headlight damage can help you prevent it in the future.
UV Exposure
The leading cause of cloudy headlights is prolonged exposure to ultraviolet (UV) rays from the sun. Over time, the factory UV-resistant coating breaks down, allowing the plastic surface to oxidize and turn yellow.
Road Debris
Small rocks, sand, dust, and other debris constantly strike the headlight lenses while driving. These impacts create tiny scratches that scatter light and reduce clarity.
Environmental Contaminants
Pollution, tree sap, insect residue, bird droppings, and road salt gradually build up on the headlight surface, contributing to discoloration and wear.
Moisture and Weather
Rain, snow, humidity, and extreme temperature changes can accelerate deterioration, particularly if the protective coating has already worn away.
Also Read: DIY Rust Repair on car Body
Signs You Need Headlight Restoration
If your headlights show any of the following symptoms, restoration may be necessary:
- Yellow or cloudy lenses
- Reduced headlight brightness
- Poor nighttime visibility
- Visible oxidation
- Surface scratches
- Dull or faded appearance
- Uneven light output
Addressing these issues early can improve visibility and help avoid more extensive damage.
Benefits of Headlight Restoration
Restoring your headlights provides several practical advantages.
Improved Visibility
Clear headlights allow more light to reach the road, improving visibility at night and in adverse weather conditions. Better illumination helps drivers detect road hazards, pedestrians, and traffic signs sooner.
Increased Safety
Brighter headlights reduce the risk of accidents by improving your ability to see and be seen by other drivers.
Enhanced Appearance
Cloudy headlights can make an otherwise well-maintained vehicle appear older than it is. Restored headlights give your car a cleaner, newer, and more attractive look.
Cost Savings
Headlight restoration is often far less expensive than replacing an entire headlight assembly, making it a cost-effective solution for many vehicles.
Higher Resale Value
A vehicle with clear headlights creates a better first impression for potential buyers and demonstrates that the car has been properly maintained.
The Headlight Restoration Process
Professional and DIY restoration methods generally follow similar steps.
Step 1: Clean the Headlights
Wash the headlight lenses thoroughly using automotive soap and water to remove dirt, dust, and grease.
Step 2: Protect the Surrounding Paint
Mask off the surrounding painted surfaces with painter’s tape to prevent accidental scratches during sanding or polishing.
Step 3: Remove Oxidation
Depending on the level of damage, fine-grit sandpaper or a specialized restoration compound is used to remove the oxidized outer layer.
Step 4: Polish the Lens
A plastic polishing compound restores clarity by smoothing the lens surface and eliminating fine scratches.
Step 5: Apply UV Protection
The final and most important step is applying a UV-resistant clear coat or sealant. This protective layer helps prevent future oxidation and extends the life of the restoration.
DIY vs. Professional Headlight Restoration
Vehicle owners often choose between restoring headlights themselves or hiring a professional.
DIY Restoration
DIY restoration kits are widely available and can be effective for headlights with light to moderate oxidation.
Advantages include:
- Lower cost
- Convenient at-home application
- Suitable for minor damage
- Readily available products
However, achieving professional-quality results requires careful preparation and attention to detail.
Professional Restoration
Professional restoration services use specialized tools, polishing equipment, and commercial-grade protective coatings.
Benefits include:
- More consistent results
- Better restoration of heavily oxidized lenses
- Longer-lasting UV protection
- Reduced risk of accidental damage
- Expert assessment of headlight condition
Professional restoration is often the best choice for severely damaged headlights.
How to Maintain Restored Headlights
Proper maintenance helps preserve clear headlights and extend the life of the restoration.
Follow these simple tips:
- Wash headlights regularly with automotive soap.
- Remove bug residue and road grime promptly.
- Apply a UV protectant every few months.
- Avoid abrasive cleaning pads.
- Park in shaded areas whenever possible.
- Inspect headlights periodically for early signs of oxidation.
Routine maintenance reduces the need for frequent restoration.
Common Mistakes to Avoid
Avoid these mistakes when restoring headlights:
- Skipping surface preparation
- Using overly aggressive sandpaper
- Applying excessive pressure while polishing
- Failing to seal the lens with UV protection
- Using household cleaners that may damage plastic
- Ignoring moisture inside the headlight housing
Taking the proper steps helps achieve longer-lasting and more effective results.
When Should You Replace Instead of Restore?
Headlight restoration is effective for most cosmetic damage, but replacement may be necessary if:
- The lens is cracked or broken.
- Moisture has entered the sealed housing.
- Internal reflectors are damaged.
- The mounting points are broken.
- The headlight continues to provide poor illumination after restoration.
In these situations, replacing the entire headlight assembly is usually the safest option.
Final Thoughts
Headlight restoration is an affordable and practical way to improve your vehicle’s safety, appearance, and overall driving experience. By removing oxidation, polishing the lens, and applying a protective UV coating, you can restore brighter headlights and enhance nighttime visibility without the expense of replacing the entire assembly.
Whether you choose a DIY restoration kit or a professional service, regular headlight maintenance helps preserve clarity, improves road safety, and keeps your vehicle looking its best. With proper care and timely restoration, your headlights can continue providing reliable performance and clear illumination for years to come.
