
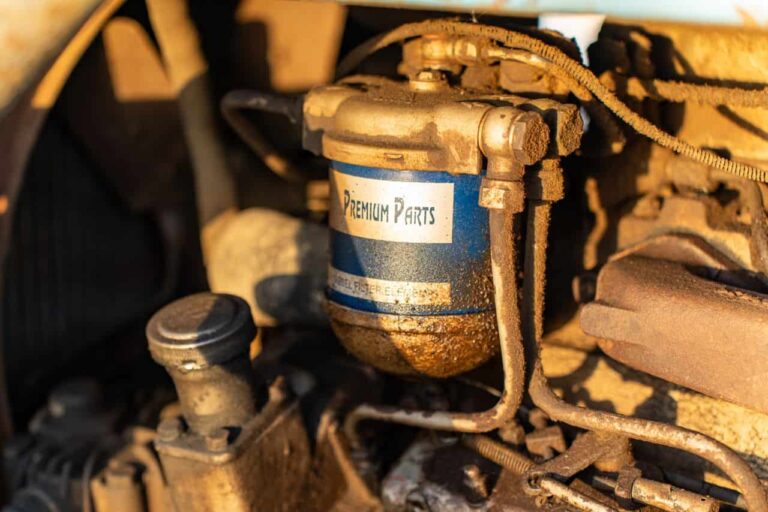
The fuel filter is an essential component of your vehicle’s fuel system. Its primary job is to remove dirt, rust, and other contaminants from the fuel before it reaches the engine. A clean fuel filter helps maintain proper fuel flow, protects fuel injectors, and ensures efficient engine performance. Over time, however, the filter becomes clogged with debris, restricting fuel flow and causing drivability issues. Learning how to replace a fuel filter is an important maintenance skill that can improve engine performance and help prevent costly fuel system repairs.
Although the replacement process varies depending on the vehicle, many fuel filters can be replaced at home using basic tools. This guide explains the general procedure while emphasizing proper safety practices.
Why the Fuel Filter Is Important
Fuel travels from the fuel tank to the engine through the fuel system. Along the way, the fuel filter captures contaminants that could damage sensitive components such as the fuel pump and fuel injectors.
Without a properly functioning fuel filter, debris may enter the engine, causing poor combustion, reduced fuel efficiency, and expensive repairs. Replacing the fuel filter at the recommended interval helps maintain consistent fuel delivery and reliable engine operation.
Signs Your Fuel Filter Needs Replacement
Several symptoms may indicate a clogged or restricted fuel filter. Common warning signs include:
- Difficulty starting the engine
- Poor acceleration
- Engine hesitation
- Rough idling
- Reduced fuel economy
- Engine stalling
- Loss of power when climbing hills or accelerating
If you notice these symptoms, inspect the fuel system before replacing parts unnecessarily.
Tools You Will Need
Gather the following tools before beginning the replacement:
- Replacement fuel filter
- Socket and wrench set
- Fuel line disconnect tool if required
- Drain pan
- Shop towels
- Safety glasses
- Protective gloves
- Jack and jack stands if necessary
- Vehicle owner’s manual
Always purchase the correct fuel filter designed for your vehicle’s make, model, year, and engine.
Safety Precautions
Fuel is highly flammable, so safety is extremely important.
Work in a well-ventilated area away from open flames, sparks, or smoking materials.
Allow the engine to cool before beginning the replacement.
Disconnect the negative battery terminal to reduce the risk of electrical sparks.
Wear safety glasses and gloves to protect yourself from fuel exposure.
Keep a fire extinguisher rated for flammable liquids nearby whenever working on the fuel system.
Also Read: How to Clean a Throttle Body
Step 1: Relieve Fuel System Pressure
Modern fuel injection systems operate under high pressure.
Before disconnecting the fuel lines, relieve fuel pressure according to your vehicle manufacturer’s recommended procedure.
This often involves removing the fuel pump fuse or relay and allowing the engine to run until it stalls.
Consult your owner’s manual for the correct pressure relief method.
Step 2: Locate the Fuel Filter
The location of the fuel filter varies by vehicle.
Some fuel filters are mounted underneath the vehicle along the fuel line, while others are located inside the fuel tank as part of the fuel pump assembly.
If your vehicle uses an in-line fuel filter, locate it using your owner’s manual before beginning the replacement.
Step 3: Raise the Vehicle if Necessary
If the fuel filter is mounted underneath the vehicle, carefully raise the vehicle using a hydraulic jack.
Support it securely with jack stands placed on solid lifting points.
Never work underneath a vehicle supported only by a hydraulic jack.
Place a drain pan beneath the fuel filter to catch any fuel that may spill during removal.
Step 4: Disconnect the Fuel Lines
Inspect the fuel line connections attached to both ends of the filter.
Depending on the design, you may need to remove retaining clips or use a fuel line disconnect tool.
Carefully disconnect the fuel lines while allowing any remaining fuel to drain into the pan.
Keep track of all clips and fittings for reinstallation.
Step 5: Remove the Old Fuel Filter
Loosen the mounting bracket or retaining clamp holding the fuel filter in place.
Carefully remove the filter from the bracket.
Inspect the old filter for excessive contamination or rust, which may indicate poor fuel quality or additional fuel system problems.
Compare the old filter with the replacement to verify the correct size and connection type.
Step 6: Install the New Fuel Filter
Check the arrow printed on the new fuel filter indicating the direction of fuel flow.
Install the filter so the arrow points toward the engine.
Position the filter in the mounting bracket and tighten the retaining clamp securely.
Reconnect the fuel lines until they lock firmly into place.
Reinstall any retaining clips removed during disassembly.
Step 7: Restore Fuel System Pressure
Reconnect the negative battery terminal.
Reinstall the fuel pump fuse or relay if it was removed.
Turn the ignition key to the “On” position for several seconds without starting the engine.
Repeat this process two or three times to allow the fuel pump to build pressure throughout the system.
Inspect the fuel filter and fuel line connections carefully for leaks before starting the engine.
Step 8: Start the Engine
Start the engine and allow it to idle for several minutes.
Check again for fuel leaks around the filter and fuel line connections.
If no leaks are present, take the vehicle for a short test drive.
Verify smooth acceleration, steady engine performance, and normal operation.
Reinspect the filter area after the test drive to confirm everything remains dry and secure.
How Often Should You Replace a Fuel Filter?
Replacement intervals vary depending on the vehicle and fuel system design.
Many manufacturers recommend replacing an external fuel filter every 30,000 to 60,000 miles, while some newer vehicles have lifetime filters integrated into the fuel pump assembly.
Always follow the maintenance schedule provided in your owner’s manual.
Common Mistakes to Avoid
Never work on the fuel system without relieving fuel pressure.
Do not install the fuel filter backward.
Avoid reusing damaged retaining clips or fuel line connectors.
Always inspect for fuel leaks before driving the vehicle.
Using the wrong replacement filter may restrict fuel flow or cause fuel leaks.
Conclusion
Learning how to replace a fuel filter is an important maintenance skill that helps protect your vehicle’s fuel system and maintain reliable engine performance. By replacing a clogged filter with a new one, you can improve fuel flow, enhance acceleration, and reduce the risk of damage to expensive components such as the fuel pump and fuel injectors.
With the proper tools, careful attention to safety, and regular maintenance, replacing a fuel filter is a manageable task for many vehicle owners. Following your manufacturer’s recommended service schedule will help keep your engine running efficiently and extend the life of your fuel system.
