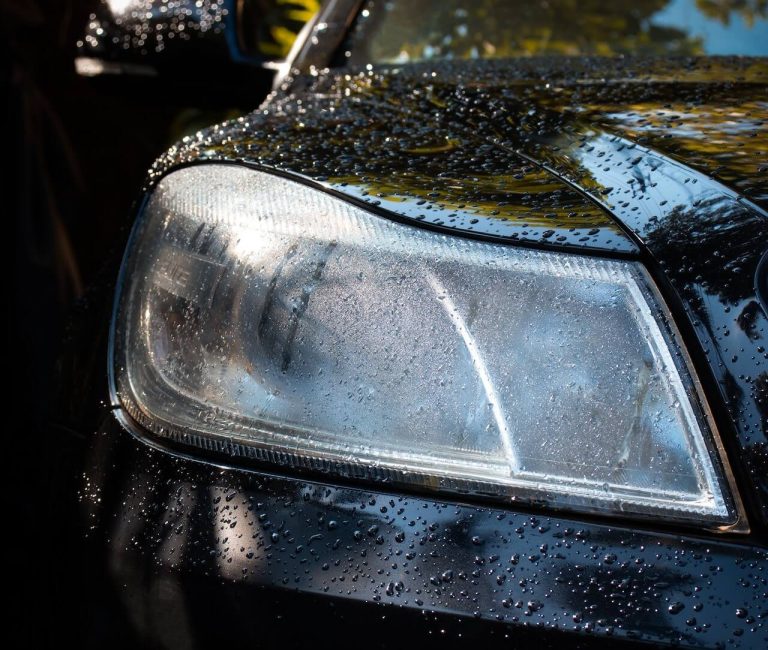
Moisture in car headlights is condensation that forms due to the accumulation of humidity and temperature changes inside the headlight assembly. Moisture build-up in car headlights can reduce light output and create a dangerous situation for drivers. It’s crucial to take care of this problem as soon as possible for safety reasons, but opening up the car hood and messing with the wiring can be a tedious process. Fortunately, there are several easy and effective solutions to get rid of moisture without doing any of that. In this post, we will go over step-by-step, how to remove moisture from car headlight without opening it. With these tricks, you can have your headlights back in full working order simply and easily.
What causes moisture in car headlights?
Humidity Levels in the Atmosphere
The most common cause of moisture in car headlights is high humidity levels in the atmosphere. When the environment contains high levels of moisture, it increases the chances that water droplets will condense on the surface of car bodies and headlight lenses.
This method, known as condensation, happens when warmer air meets a cold surface like plastic or glass. In other words, if you live in an area with high humidity levels, your car headlights are more likely to experience fogging due to condensation.
Leaks
Another possible cause of moisture in car headlights is leaking. Over time, seals around headlight assemblies can become worn down or cracked due to age or exposure to hot temperatures. When this happens, water from outside sources can seep into the headlight assembly and create excess moisture inside the lens.
If your vehicle has recently experienced flooding or been exposed to heavy rainstorms, it might be worth checking for any signs of leakage around your headlight assemblies.
Temperature Fluctuations
Finally, temperature change can also contribute to moisture build-up inside car headlights. This occurs because hot air rises while cold air sinks; as a result, when temperatures vary between day and night—or even within a single 24-hour period—warm air may come into contact with cold surfaces such as headlight lenses and cause condensation to form on them.
To avoid this issue, try parking your car away from direct sunlight during hot days or in a shaded area during colder times of the year. By doing so, you can help reduce the chance of temperature-related condensation issues inside your car’s headlights!
No Ventilation System
Finally, some cars don’t have a ventilation system installed in their headlights which can lead to moisture accumulation over time. Heat generated by the engine and exhaust can be trapped inside the headlight housing if there is inadequate ventilation, leading to condensation when cool air enters from outside sources like windows or door frames.
To avoid this issue, be sure to install sufficient ventilation in your car so that air can move freely throughout the headlight housing and not become trapped.
Ways to getting moisture out of headlights
Utilizing Direct Sunlight
Foggy headlights are a common problem for car owners. But, instead of replacing them, you can use the sun’s natural power to remove moisture from the inside of your headlight lens. Keep reading to find out how you can use sunlight to fix foggy headlights.
The Science Behind It
When moisture builds up inside a headlight, it’s because warm air is leaking through the lens. This warm air contains humidity and condensation, which can form droplets on the interior surface of the headlight. Now, when direct sunlight hits these droplets, they will heat up quickly and start to evaporate away, leaving behind clean glass.
The key here is to make sure that the direct sunlight is as strong as possible so that it can penetrate deep into the headlight.
How To Do It Right
To ensure optimum results when utilizing direct sunlight to clear your car headlights of condensation, there are a few things that you ought to consider. First look for a parking spot that is not blocked by any trees or other objects to maximize the exposure of your car to direct sunlight.
Secondly, leave your headlights uncovered it will allow more light to enter and facilitate faster evaporation. Lastly, let the sun work its magic for about 10-15 minutes before wiping down any remaining water droplets with a microfiber cloth or cotton swab.

Disconnect the Battery
Disconnecting your car’s battery is an easy and effective way of removing any trapped moisture from inside a headlight assembly without having to take apart anything else. Not only will it save you time but also money since you won’t need additional tools or equipment in order to complete this task successfully! So keep this trick in mind when you’re dealing with foggy headlights—disconnecting the battery just might be all that’s needed!
The Science Behind It
For moisture to enter an enclosed area like a headlight assembly, there must be a difference in pressure between the internal and external environment. This pressure divergence is caused by alterations in temperature, moisture levels, and air pressure.
When you disconnect the battery of your car, this pressure difference is eliminated since both sides are now equalized. This allows any trapped moisture within the headlight assembly to evaporate without having to open up the unit itself.
How To Do It Yourself
To take advantage of this trick yourself, all you have to do is disconnect the battery in your car. Start by opening your hood and locating the negative terminal on your battery (it will usually be marked with a minus sign). Then simply use a wrench or pliers to loosen and remove the negative cable from its terminal.
Make sure not to touch any metal parts with your hands or tools during this process, as that could cause sparks which could lead to an explosion or fire if there is fuel present in your engine compartment. Once everything is disconnected, leave it like that for about 15 minutes before reconnecting it again. The trapped moisture should have evaporated by then!
Also Read: How To Get A Replacement Car Key Without The Original
Vacuum Cleaner with Crevice Tool Attachment
A vacuum cleaner crevice tool attachment is exactly what it sounds like – an attachment that fits onto the end of a standard vacuum cleaner hose. This attachment has small, thin angled bristles, which make it perfect for getting into tight spaces and removing dirt, dust, and other debris from hard-to-reach places.
In addition, these bristles are also great for removing moisture from headlight lenses in cars. Investing in one today may save you money—and potentially lives—in the future!
How Does It Work?
Using the crevice tool attachment is quite simple. First, you’ll want to turn on your car and open all doors and windows so that your engine can cool down. Once everything has cooled off, attach the crevice tool to the end of your vacuum hose and insert it into the headlight lens opening. Then simply press down lightly and start vacuuming!
You’ll want to move slowly so as not to cause any damage to the lens but be sure not to linger too long in one spot as this could cause heat build-up inside the lens resulting in cracking or warping of the plastic material. After a few minutes of vacuuming, you should notice that moisture has been removed from your headlight lenses, and they appear much brighter than before!
Benefits of Using Vacuum Cleaner Crevice Tool Attachment
Using a vacuum cleaner crevice tool attachment offers numerous benefits. Not only will it help keep your headlights clean and clear, but it will also reduce glare on dark roads allowing for better visibility while driving at night. Additionally, this handy little device is relatively inexpensive compared to other methods of headlight cleaning and can be used repeatedly over time with proper maintenance and care.
Finally, using this type of tool is much safer than other methods, such as sanding or chemical cleaners, since there’s no risk of damaging or scratching delicate surfaces as there might be with those types of tools or products.
Desiccants like Silica Gel
A desiccant is a hygroscopic substance used to absorb moisture from its surroundings. They are most commonly found as small packets labeled “Do Not Eat” that come with products like shoes and electronics. This is because these items can be damaged if exposed to too much moisture in the air.
Silica gel is an example of such a desiccant; it’s made from silicon dioxide, which has an affinity for water molecules, making it highly effective at absorbing humidity and preventing mold growth or corrosion due to humidity in enclosed spaces.
How To Use Desiccants
To use a silica gel packet for removing moisture from your car headlight, open up the packet and place it behind the lens or inside the housing unit where there may be trapped air pockets trapping moisture. The packet will absorb any excess humidity in these areas and improve your car’s visibility while driving at night or in bad weather conditions.
Once all of the water has been absorbed by the silica gel packet, simply dispose of it safely and replace it with another one as needed. It’s important to keep in mind that this process should be done regularly in order for it to be effective; otherwise, your headlights may become fogged up again over time due to excess humidity build-up inside them.

Benefits of Using Desiccants
There are many benefits of using desiccants like silica gel packets for removing moisture from your car headlight. These include better visibility, reduced fogging on the inside of the headlight lens, improved illumination, longer-lasting headlights, and less frequent replacements of bulbs or lenses due to condensation build-up.
Additionally, using a desiccant will also save you time and money since you won’t have to constantly replace bulbs or lenses due to fogging caused by condensation build-up.
Heat Gun or Hair Dryer
Another way to remove moisture from your headlight without opening it is by using either a heat gun or a hair dryer. Let’s discuss which tool will best serve this purpose.
Heat Gun Method
A heat gun is a great tool for removing moisture from car headlights without opening. It works by heating up the air inside the lens, causing the moisture to evaporate quickly and easily. The advantage of using a heat gun is that it provides an even distribution of heat over the entire surface area of the lens.
This helps ensure that all of the moisture is removed quickly and efficiently without leaving any spots behind. It also has adjustable temperature settings, so you can customize it to suit your needs. However, one downside to using a heat gun is that it requires more time and effort than other methods, such as a hair dryer or compressed air.
When using this method, be sure not to overheat the light because it can cause damage to its components.
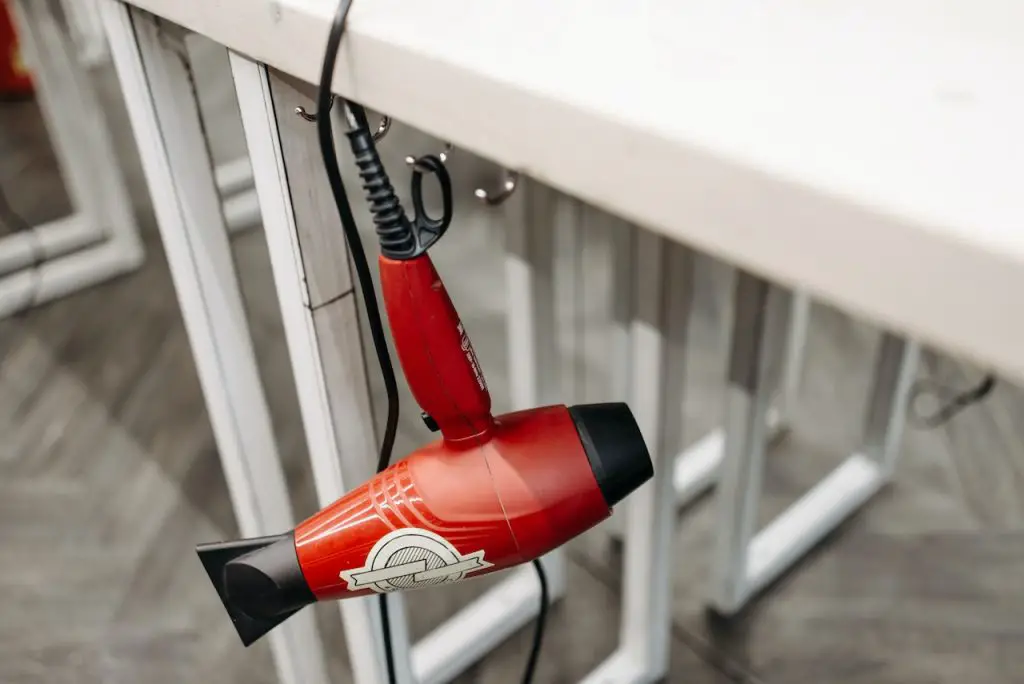
Hair Dryer Method
Using a hair dryer to remove moisture from car headlights can be effective if done properly. First, make sure you are using low heat settings and move the dryer in circles around the headlight lens so that all areas are heated evenly and thoroughly. Be careful not to stay in one spot too long, or else you could damage your headlight lens with excessive heat!
Hair dryers also produce more noise than other tools like heat guns, so keep this in mind if noise is an issue for you. Additionally, some people prefer not to use hair dryers because they don’t provide as even of a distribution of temperature as heat guns do.
Also Read: How to Make A Black Car Shine Like Glass
Bulb Protectors / Moisture-Absorbing Covers
Bulb protectors are covers that are placed over your car’s headlight bulbs to absorb any moisture that is present. They work by trapping the condensation between the bulb and the cover, allowing it to evaporate over time. This process helps keep your headlights working efficiently and prevents any further damage caused by moisture build-up.
How Long Do Bulb Protectors Last?
The lifespan of bulb protectors varies depending on how often you use them and how well you take care of them. Generally speaking, most bulb protectors will last for several months before needing to be replaced due to wear and tear or excessive exposure to dirt or dust particles in the air. It’s important to note that if you don’t regularly clean and maintain your bulb protectors, their lifespan will be significantly reduced.
Benefits of Using Bulb Protectors
Bulb protectors offer several benefits when it comes to protecting your car’s headlights from moisture build-up. First, they can be used without having to open up the headlight housing, making them much more convenient than other methods of removing moisture.
Second, they help reduce glare by reducing the amount of light reflected off the outside of the headlight housing. Finally, they can help improve visibility in rainy weather as they prevent water droplets from forming on the lens surface, which can cause blurred vision while driving.
The above mention solutions is best answer for How To Remove Moisture From Car Headlight Without Opening
Frequently Asked Questions
How often should I check my car headlight for moisture?
Checking your car headlights for the moisture is an important part of keeping your vehicle running in optimal condition. Depending on the environment and climate, it is recommended that you check your lights at least every few months. Moisture build-up can impact the durability and longevity of your car headlights, as well as mute their brightness and luminescence.
To avoid any potential issues, make sure to perform a thorough inspection regularly and clean any build-up in the headlight lens with a damp rag or cloth before drying it off immediately to prevent further deterioration. Doing so will help ensure a safe driving experience while preventing costly repairs down the road.
How do I prevent moisture from getting into my car headlight in the first place?
The best way to prevent moisture from entering your car headlights in the first place is by keeping the area around them clean and dry. Be sure to regularly clean any debris or dirt off of your headlights to avoid allowing moisture to build up. Additionally, you can consider installing headlight covers or protective films, as they can help provide an extra layer of protection against moisture and debris. If you reside in an area with high humidity, then investing in a dehumidifier may be worthwhile to decrease the moisture content of the air and maintain your car headlights dry all year.
What is the approximate cost of repairing moisture damage in car headlights?
The cost of repairing moisture damage in car headlights can vary depending on the extent of the damage. The most common repair is to replace the headlight lens, which can cost anywhere from $50-$100 per lens.
Additional repairs may also be needed to replace wiring or bulbs, which could add an extra $50-$100 to the overall cost of repairs. It may also be necessary to have a professional technician inspect and repair the headlight assembly, which could add labor costs ranging from $30-$60 per hour.
What are the consequences of driving with moisture in my car headlights?
Driving with moisture in car headlights can be dangerous as the light becomes significantly dimmed, making it difficult to see other vehicles and any potential hazards on the road. This increases the risk of collisions or accidents. In addition, moisture damage can cause corrosion to parts inside the headlight assembly, leading to more costly repairs or even need a complete replacement of the entire system.
Conclusion
In conclusion, removing moisture from car headlights without opening them is a safe and simple process that requires minimal tools and only a few minutes of your time. It can save you money in the long run by avoiding costly repairs or replacements due to corrosion and damage from water exposure. As always, it’s important to stay safe on the roads, and having working headlights is key to ensuring everyone’s visibility!
